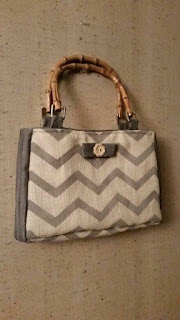
Hello there! So one of my favorite things is a basic hobo bag, something that I can throw whatever I need to in it, whether its my wallet and phone when I'm running to the store, some suntan lotion and sun glasses as I'm on my way to the lake, or even a few ingredients as we are running out the door to go make dinner for my in-laws. So I figured what better To do my very first tutorial on than a fun spring hobo bag!
Now please, bear with me,since this is my first tutorial I have ever done!
So to make the following bag, i used both my serger and my sewing machine. but if you don't have a serger, not to worry! this bag is perfectly fine to make with just the sewing machine alone. I would just be sure to do the seams twice for extra strength, or do a rig-zag stitch as well as the regular straight stitch. because heaven forbid you have everything in there and end up with a split seam as you are walking through one of the isles in Safeway. And I speak from experience, I have had this happen before! I was walking through the store, when the bottom of my bag ripped, and out spilled EVERYTHING! Believe me, trying to pick up a wallet, a few receipts,chap stick, my phone, and several tampons in the middle of the produce section was NOT fun. Any way, back to the tutorial...

So I am going to show you how to make this cute little bag! Its very handy with a long strap so you can wear it across your body, and has a pocket inside to keep small things separate. Finished bag measured about 10 X 12 inches.
RS= Right side
WR= Wrong side
FF= fusible fleece
I used a 1/4 inch seam allowance.
Materials needed:
1 yard outer fabric
1 yard for lining and bottom of bag
1 yard fusible fleece
matching thread
Cut the following out of the outer fabric:
2 pieces- 2 1/2 inch by 36 inch for strap
2 pieces- 1 1/2 by 10 for tie
2 pieces- 13 by 9 for main body
1 piece- 9 by 6 for inside pocket
Cut the following out of the lining fabric:
2 pieces- 13 by 4 for outer bottom of bag with 1x1 inch square cut out of the bottom corners
2 pieces- 12 1/2 by 13 for inside lining with 1x1 inch squares cut out of the bottom corners
Cut the following out of fusible fleece:
2 pieces- 12 1/2 by 13 with 1x1 inch squares cut out of the bottom corners
1 piece- 2 1/2 by 36 inches
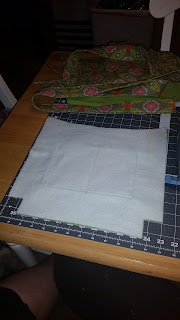
Start out by ironing the FF to the WS lining pieces, a to the WS of one of the straps.
Place the straps RS together, and sew down the outside of the long edges. Turn Straps RS out, sew along the outside edges, and set aside for later.
Take your small pieces for the ties, and fold them in half, RS together, and sew down edge and then turn them RS out, and also set them aside for later.
Whew...! The annoying little pieces are done! On to the fun part!
Fold the fabric for the pocket in half RS together, and sew around the outside edges, leaving 2 inches unsewn in one corner. Using that hole, reach in and grab the inside and pull it through, turning the pocket RS out. Now turn the rough edges in and pin it so it matches the rest of the sewn edges. Place the pocket in the middle of one of the lining pieces and sew the sides and bottom to it, then if you want, make a seam down the middle of the pocket, so it turns it into 2 smaller pockets.
Take your outer fabric pieces and lay them RS together, the fold them in half length wise. Measure down 1 inch on the folded side, and cut a curve from there to the outer top corner. This will give the top of the bag a slight U shape instead of being straight across. It seems to make it fit against your body a little more comfortably. Do the same with the lining pieces that have the fusible fleece attached.
Now take the bottom pieces that are the same color as the lining and place them RS together on the bottom section of the outer fabric, and sew along the bottom, then press open.
Now take both outer pieces and lay them RS together, and sew the sides and bottom together.
The next part can be a little confusing, and kinda hard to explain, so hopefully the photos will help. Take the one of the bottom corner that has the square cut out, and open it up, then place the seems together and pin it in place. Sew along the edge, which creates the flat corner on the bottom of the bag. Do the same to the lining pieces, being sure to leave 2 inches unsewn on the bottom seam for turning the bag RS out.
Now turn the inside section of the bag RS out and take the strap that you had sewn earlier, and match the edges to the top edge of the bag, centering them over the side seems. Take the small ties you had sewn, and place one on the center of each side of the bag with the rough edges together. Pin all the straps in place securely.
Now turn the outer section of the bag inside out, and place the lining portion that has the straps attached inside of the outer section, so that the RS of the fabrics are facing each other.
Pin the edges together, than sew along the top, securing the outer and lining sections together.
Pull the inner section out and away from the outer, and them using the 2 inch hole you left unsewn, reach through and pull the bag through it, turning it RS out
Now pin and sew along the hole you had used to turn the bag RS out, and then put the lining back in the bag.
Press or pin the to of the purse so it stays in place, and then sew along the top of the purse.
And there you have it! A cute Hobo bag, all ready for its first use! Hope you enjoyed my first tutorial, and please feel free to ask questions or leave a comment!


